September Fun Fold Blog Hop- Thank you for joining us. Wait ’till you see the beautiful cards the demonstrators have created for you this month.
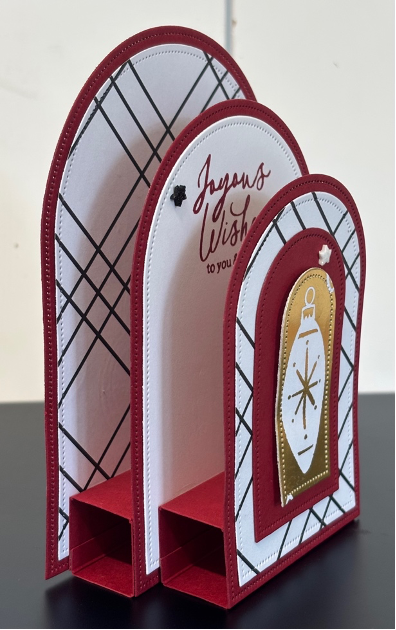
This card is easy to make, but has many parts.
The materials I used are:
- Stamp Set – Bauble Blooms
- Card Stock – Basic White Card Stock ; Cherry Cobbler (119685)
- Stamp Pad –Cherry Cobbler Ink
- Misc. – Modern Christmas Designer Series Paper (DSP); Dimensionals; Multipurpose Glue; Tear & Tape; Everyday Arches Dies; Shimmer Star Foam Stickers
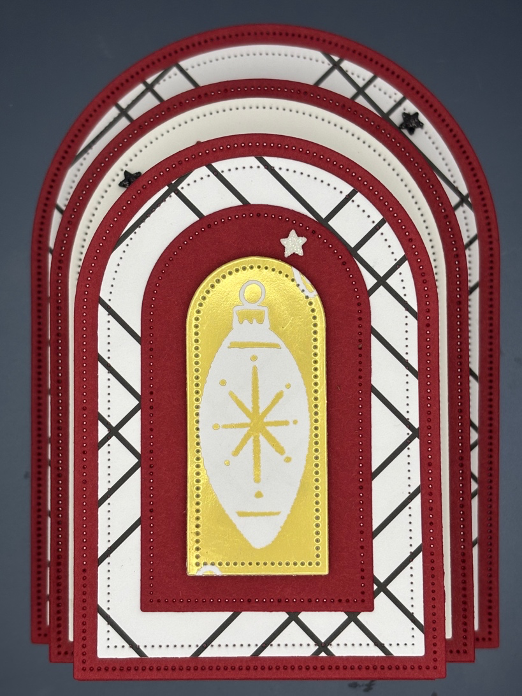
- Measurements:
- Cherry Cobbler Card Stock: Cut with Arches 1,3,5,8 (counting from largest to smallest)
- Cherry Cobbler Card Stock: Back Box: 3-1/4” x 3-1/4” scored at ¾”, 1-1/2”, 2-1/4”, 3”
- Cherry Cobbler Card Stock: Front Box: 3-1/4” x 2-1/2” scored at ¾”, 1-1/2”, 2-1/4”, 3”
- Basic White Card Stock: Cut with Arches (2) 4,10
- DSP: Cut with Arches 2,6,10
- Instructions:
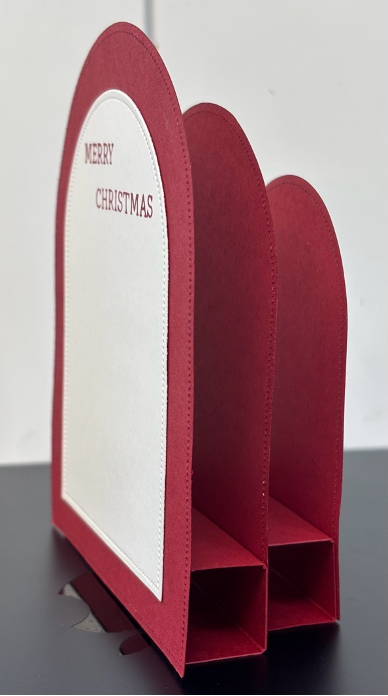
- Burnish both boxes.
- Add Tear & Tape to the narrowest section on both boxes.
- Close the box in half and adhere, repeat with 2nd box.
- Center and adhere the largest DSP (#2) to largest Cherry Cobbler (#1)
- Stamp a sentiment on the Basic White card stock (#4)
- Center and adhere (#4) to (#3) Cherry Cobbler
- Center and adhere (#5) Cherry Cobbler to (#6) DSP
- Center (#10) DSP to (#10) Basic White
- Center this unit to (#8) Cherry Cobbler
- Center and adhere the largest box to the bottom of the largest arch with DSP, align well along the bottom
- Center and adhere the Basic White/stamped arch to the front of the box.
- Center and adhere the smaller box to the stamped/basic white card stock
- Center and adhere the smaller DSP arch to the front of the box
- Center and adhere, using dimensionals, the smallest DSP arch to the last panel.
- Embellish as desired.
- Front View Side View
This card is CASED from Ready, Set, Demo-Liz Shannon
Please be sure to Hop through the other blogs to see the beautiful fun fold cards.