Independent Stampin’ Up! Demonstrators Fun Fold Blog Hop

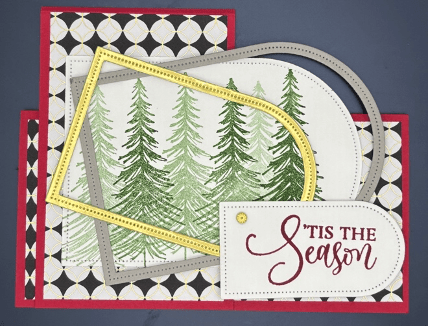
September Fun Fold Blog Hop- Thank you for joining us. Wait ’till you see the beautiful cards the demonstrators have created for you this month.

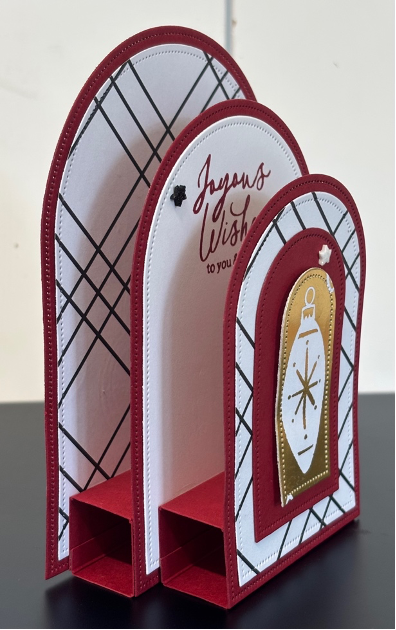
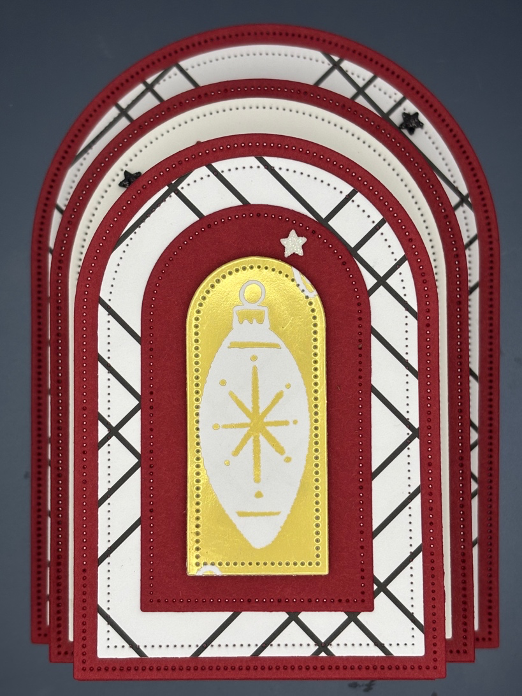
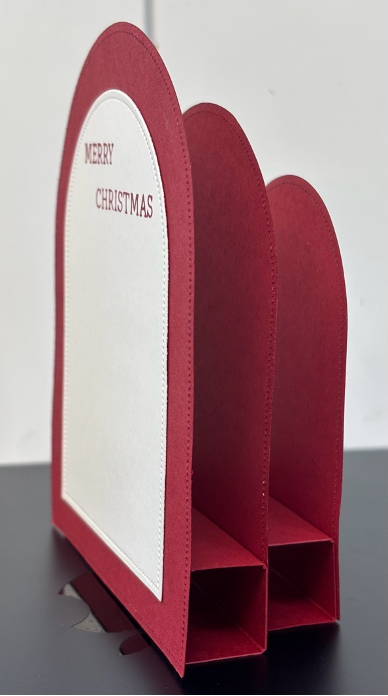
This card is easy to make, but has many parts.

The materials I used are:

  • Stamp SetBauble Blooms
  • Card Stock – Basic White Card Stock ; Cherry Cobbler (119685)
  • Stamp Pad –Cherry Cobbler Ink
  • Misc. – Modern Christmas Designer Series Paper (DSP); Dimensionals; Multipurpose Glue; Tear & Tape; Everyday Arches Dies; Shimmer Star Foam Stickers   
  • Measurements:     
  • Cherry Cobbler Card Stock: Cut with Arches 1,3,5,8 (counting from largest to smallest)
  • Cherry Cobbler Card Stock: Back Box: 3-1/4” x 3-1/4” scored at ¾”, 1-1/2”, 2-1/4”, 3”
  • Cherry Cobbler Card Stock: Front Box: 3-1/4” x 2-1/2” scored at ¾”, 1-1/2”, 2-1/4”, 3”
  • Basic White Card Stock: Cut with Arches (2) 4,10
  • DSP: Cut with Arches 2,6,10        
  • Instructions:
  1. Burnish both boxes.
  2. Add Tear & Tape to the narrowest section on both boxes.
  3. Close the box in half and adhere, repeat with 2nd box.
  4. Center and adhere the largest DSP (#2) to largest Cherry Cobbler (#1)
  5. Stamp a sentiment on the Basic White card stock (#4)
  6. Center and adhere (#4) to (#3) Cherry Cobbler
  7. Center and adhere (#5) Cherry Cobbler to (#6) DSP
  8. Center (#10) DSP to (#10) Basic White
  9. Center this unit to (#8) Cherry Cobbler
  10. Center and adhere the largest box to the bottom of the largest arch with DSP, align well along the bottom
  11. Center and adhere the Basic White/stamped arch to the front of the box.
  12. Center and adhere the smaller box to the stamped/basic white card stock
  13. Center and adhere the smaller DSP arch to the front of the box
  14. Center and adhere, using dimensionals, the smallest DSP arch to the last panel.
  15. Embellish as desired.
  16. Front View Side View

This card is CASED from Ready, Set, Demo-Liz Shannon

Please be sure to Hop through the other blogs to see the beautiful fun fold cards.

SU Demo Fun Fold Blog Hop Lineup

  1. Su Mohr
  2. Michele Deschenes
  3. Debbie Mageed
  4. Sue Jackson
  5. Mary Deatherage
  6. Karen Finkle
  7. Tara Carpenter
  8. Lisa Ann Bernard

Fancy/Fun Fold Blog Hop-September 2025

Thank you for stopping by to see our September 2025 Blog Hop.

Please be sure to scroll down to see other participants and check out their beautiful designs.

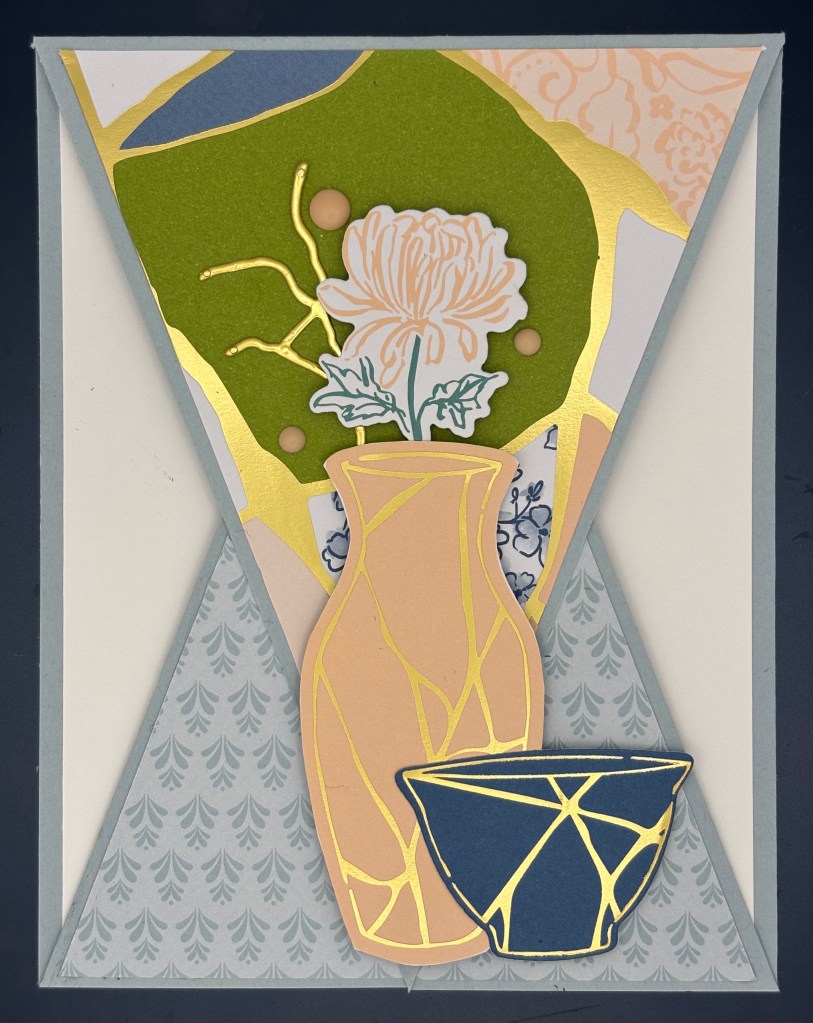
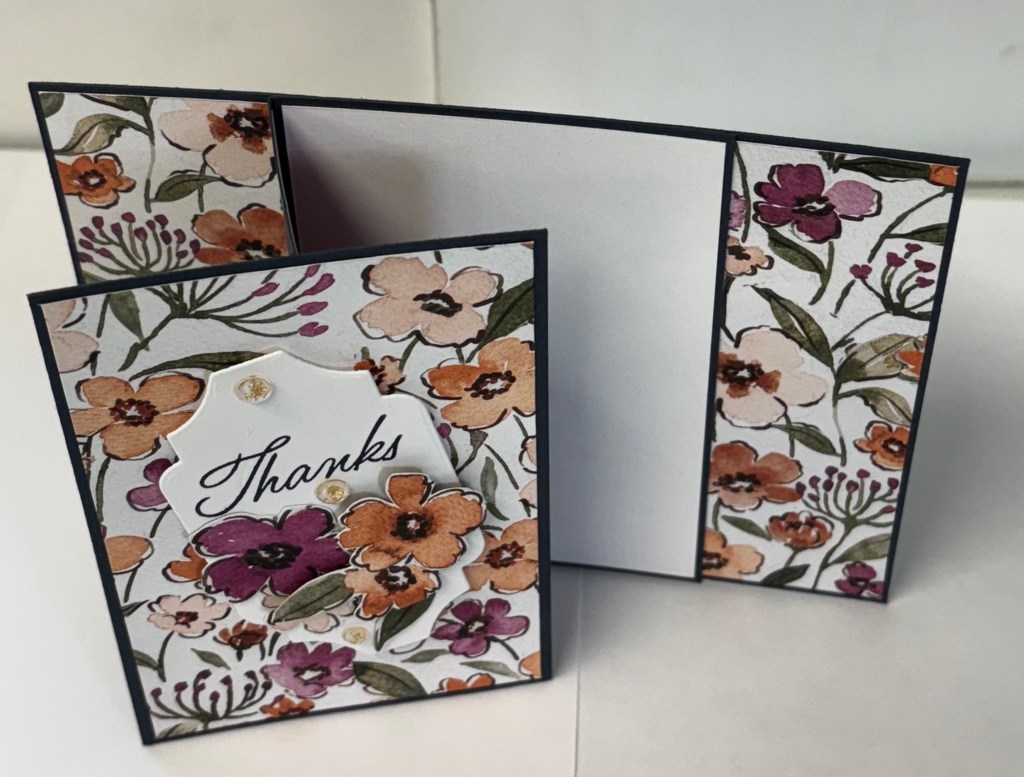
This month’s card was a fun one to make. It’s a center Z fold card.

I cut a piece of card stock at 4-1/4″ x 5-1/2″. Then a second piece at 4-1/4″ x 5-1/2″ and scored it at 1-3/8″ and 2-3/4″ (mountain, valley). A third piece of the same card stock at 2-3/4″ x 4-1/4″

Burnish your fold well.

I cut a pieces of Floral Charm DSP at 1-1/2″ x 4-1/8″. I then cut a second piece along the same paper at 2-5/8″ x 4-1/8″. And a third piece was cut at 1-1/2″ x 4-1/8″ to ensure the pattern flows.

Cut one piece of coordinating DSP at 1-1/4″ x 4-1/8″.

Center the (2) 1-1/2″ x 4-1/8″ DSP pieces on the base. Adhere them on the left and right of the 4-1/4″ x 5-1/2″ base.

Center and adhere the 1-1/4″ x 4-1/8″ coordinating DSP on the inside, middle scored area. Center and adhere the 2-5/8″ x 4-1/8″ DSP to the 2-3/4″ x 4-1/4″ card stock.

Cut a piece of basic white card stock at 2-5/8″ x 4-1/8″. Center and adhere to the last fold of the scored 4-1/4″ x 5-1/2″ card stock.

Center and adhere this unit to the 1st fold section, putting glue only on the left side.

Center and adhere this unit to the center of the 4-1/4″ x 5-1/2″ base card. This creates a Z on the flat layer.

I die cut a tag. I stamped it and attached fussy cut flowers along the bottom of the die cut.Using dimensionals, adhere to the front panel. I also placed one inside on the white card stock. I embellished it with Strawberry Slush and Pretty in Pink embellishments.

I hope you like this simple but pretty Z fun fold.

1.Tracy Held – Trace Of Creativity (Australia)
2.Melva Peters – Stamping With Melva (Canada)
3.Michele Deschenes Michele’s Craft Cottage (USA)
4.Sharni Green – The Stamping Green (Australia)

Scrapbooking Global Blog Hop-September 2025

Welcome, here is the September Blog Hop! The theme this month is using Flip Flaps (interactive page). If you don’t know what Flip Flaps are I will explain. They are clear envelopes. You can attach them to your scrapbook page. This lets you have more photos on a page. This allows me to have 11 photos and a journal section on one scrapbook page. They can be added to the outside of the sleeve. (see photo at the bottom of the post).

I was excited for this challenge as I have some Flip Flaps but have not used them yet. So this forced me to think about how I might use them.

I used a piece of 12″ x 12″ DSP as my base. I took a sheet from Mixed Media Florals. I used coordinating card stock. I cut them to fit the Flip Flaps-3″ x 4″. I adhered 4 of them to the 12″ x 12″ base. I put the page into a sleeve. Then I aligned 4 Flip Flaps directly above the 4 that were glued to the DSP. I punched 4 tabs and adhered them to the Flip Flaps.

I removed the page from the sleeve and added the words using the Mini Alphabet dies in coordinating DSP. I added a journal page under one Flip Flap from the Just a Note stamp set. I also included 2 paperclips from the Stamp and die set Just a Note.

I embellished the page with Cute Stars Adhesive-Backed Sequins.

This was a fun page to create. I hope you like it and all the others who are listed below. Please follow the blog hop to see other ideas. You definitely have to try them!

Julia Quinn – Handmade by Julia Quinn (Australia)
2.
Margaret Workman – Crafty Chemist Designs (USA)
3.
Michele Jutrisa- Butterflys and Bows(Australia)
4.
Cheryl Taylor – Stampin n crafting with Cheryldiana – UK
5.
Michele Deschenes Michele’s Craft Cottage (USA)
6.
Scrapbooking Global Blog Hop: Use Flip Flaps