Welcome to our monthly Blog Hop. Thank you for joining us!
I created a fun fold card that I’m sure you have seen before. But with this one, I used Creative Haven. I used some of the pop-outs and did some fussy cutting to decorate the flap. This was very fun to do, choosing the pieces I wanted to use amoungst all the choices available.
This card can have so many themes. Sewing, books, aroma therapy just to name a few. Take another look at this fun paper and see what you can do.
Please be sure to follow the wonderful creators listed below to see the other designs.
Hi everyone! Thank you for stopping by to see all the creative artisan’s Fancy/Fun fold cards.
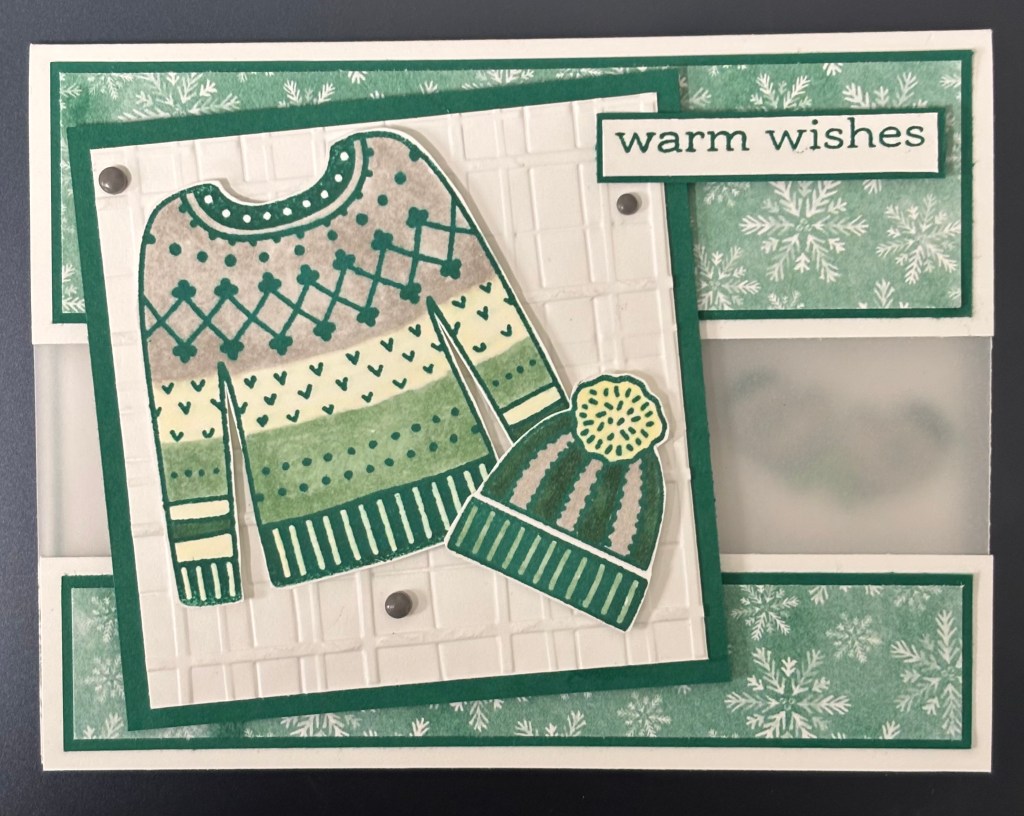
I took inspiration from Peggy Murwin, and made it my own.
I used Stay Warm stamp set to create my sweater, hat and mittens. I used Notes & Totes stamp Sending warm wishes and cut off the “sending” word.
For the card I cut a base at 6″ x 5-1/2″ scored at 4-1/4″. Cut a 1-1/4″ x 5-1/2″ for the bottom panel, that holds the card together.
First, cut a 3-1/2″ x 3-1/2″ coordinating color. This will hold the embossed 3-1/4″ x 3-1/4″ basic white. I place the colored and fussy cut sweater and hat on it.
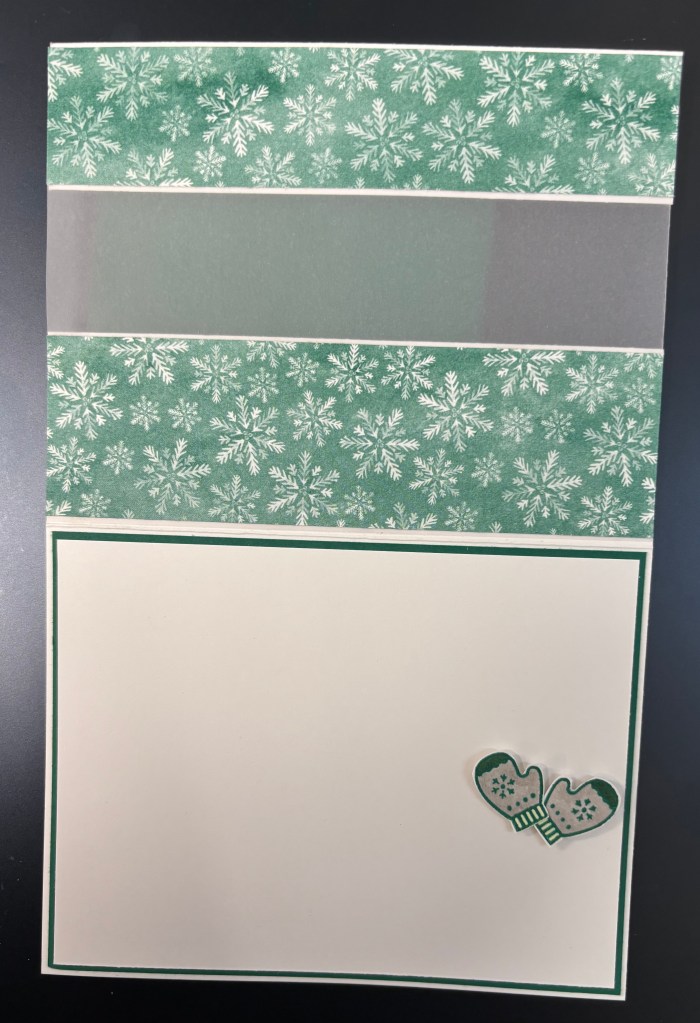
I attached a piece of Vellum behind these 3 pieces, on the inside of the card. Then used more DSP to brighten up the inside and cover up the glue showing through the Vellum.
I colored, fussy cut the 2 mittens and using dimensionals attached them behind the Vellum, on the inside.
This can be a “Winter card” vs a Christmas card. It can be used for a friend/family member who has a birthday during the winter.
I hope you liked my card. I also hope you can take a minute to look at the others on the Blog Hop below.
Welcome back! Thank you for tracking this month’s Blog Hop.
My card is called a Pull-Out Pop-Up card. I used the beautiful Painterly Pears DSP. It has a mechanism under the front flap. When you pull the Old Olive and yellow DSP, it comes out. Then, a flap pops up. (see photo’s below.)
I got the tutorial from Stamping with Amore. She made a cute card for a child. I used Painterly Pears in my version. I made a tutorial for this card. If you would like the tutorial, message me and I will e-mail it to you.
Please follow the links below for many more beautiful fun fold cards. And thank you so much for taking the time to follow our blog hop.
Welcome to the SU Demo Fun Fold Blog Hop! You will find many more gorgeous fun fold cards by using the links below.
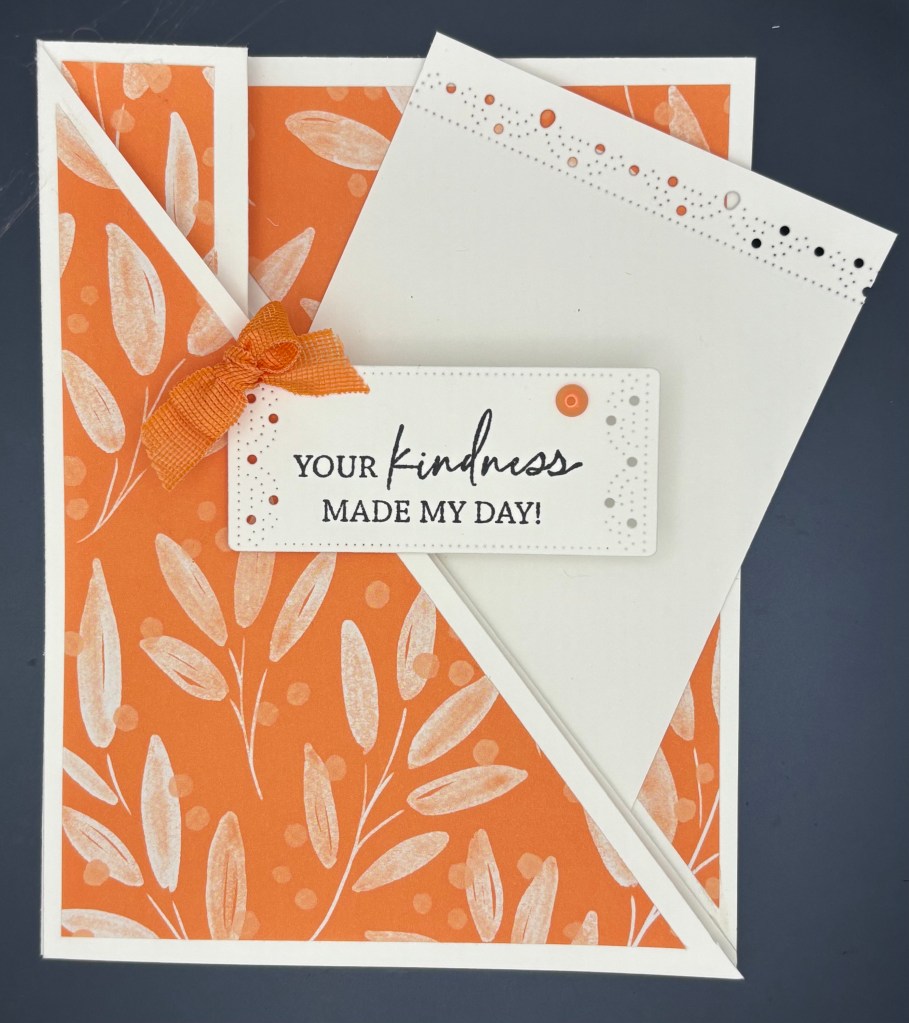
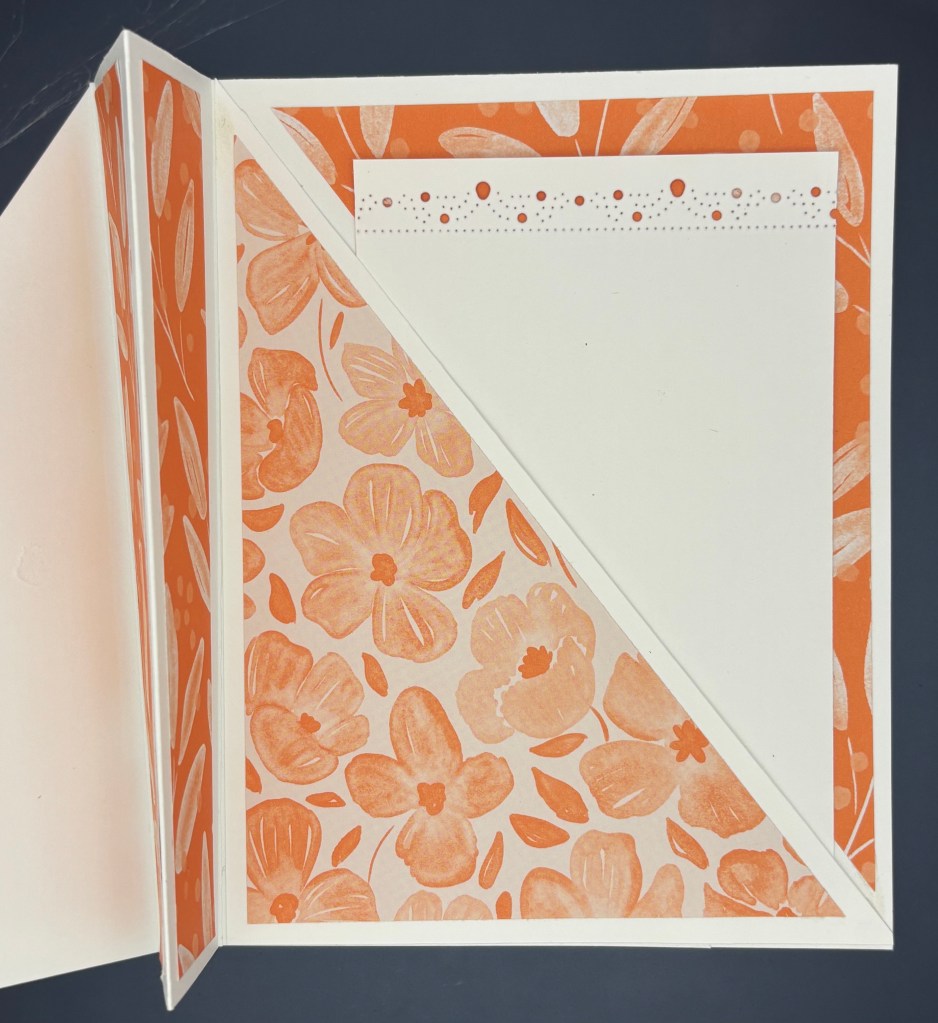
For my fun fold, this month I made an Accordion Pocket Fold inspired by Lisa Ann Bernard.
The Base is 5-1/2″ x 11″ scored at 4-1/4″, 5-1/2″ and 6-3/4″. Then I cut from the 4-1/4″ score line to the bottom right corner (save this piece).
I cut a 6″ 20250-2027 In Color DSP to 4″ x 5-1/4″. I cut this piece diagonally from the top left corner to the bottom right corner. I centered and adhered the left triangle to the front of the card. Then centered and adhered the right triangle to the inside top right.
I cut 2 pieces of the same DSP strips at 7/8″ x 5-1/4″. I centered them and adhered them to the inside pillars.
I adhered the “saved” triangle on the inside left of the card. I used Tear and Tape around 2 edges. It was placed right along the 3rd fold line creating a pocket.
I cut a 3-3/4″ x 5″ coordinating DSP. Then cut it diagonally at the top left corner down to the bottom right corner. Center and adhere this DSP to the pocket.
I cut a 3″ x 4-1/2″ piece of white cardstock. Then, I used the Sentimental Frame Dies to decorate the top edge.
Again using the Sentimental Frame dies, I cut a rectangle to use for the sentiment. I used Mixed Labels Stamp Set for the sentiment.
Using Timid Tiger Ribbon, I made a small bow and adhered it with a glue dot. I embellished the card with (1) 2025-2027 In Color Flat Pearl.
This card turned out nice and I enjoyed creating it. The only suggestion I have is be careful for directional DSP.
Thank you for stopping by! Be sure to follow the links below to see the other featured artisans.
Welcome to the Independent Stampin’ Up! Demonstrators Fun Folds Blog Hop. There’s a lineup below to make it easy for you to hop along and see everyone’s creations.
This month I used the beautiful Kintsugi Inspirations DSP, stamp and dies. If you don’t know what Kintsugi is here is what AI on Google says about it. “Also known as kintsukuroi, it is the Japanese art of repairing broken pottery. This is done by mending the cracks with lacquer mixed with gold, silver, or platinum.”
It is a ancient art form. The DSP in this suite is amazing.
My card is a shadow box fun fold. It starts with a standard card 5-1/2″ x 8-1/2″ scored at 4-1/4″. To the front of the card I added a piece of DSP that measures 4″ x 5-1/2″. I cut another piece of the same cardstock at 5-1/2″ x 6-1/4″. and scored at 1/2″ and 1″ from the left and right on the 6-1/4″ side. Folded and burnished the score lines. Using the largest Sentimental Framing dies I cut out a frame on matching cardstock. With the smaller frame, I then centered and cut a rectangle, for a window. Then I centered the frame on the 5-1/2″ x 6-1/4″ front.
After that I adhered the furthest fold, using glue, to the card front. (be sure to check that you have the card base orientated correctly.)
I used Tear n Tape on both ends of a piece of 1/2″ x 3-7/8″ window sheet. I centered the piece behind the opening. This is where I placed my sentiment.
I fussy cut a bowl and a vase from the DSP, and adhered using dimensionals. I cut the floral piece, in white cardstock, using the die from the set. I then placed it in the tall vase, using glue.
I used the gold Floral Accents embellishments. On the inside of the card, I adhered a piece of 4″ x 5-1/4″ white cardstock. Add a sentiment as desired.
I hope you like this version of a shadow box.
Please follow the links below to see more stunning cards.